
| Orig. Posting Date | User Name | Edit Date |
| Nov 27, 2023 07:50PM | 6464s | Edited: Nov 28, 2023 05:42AM |
| Nov 27, 2023 06:24PM | Dr Mini | |
| Nov 25, 2023 05:38AM | 6464s | Edited: Nov 25, 2023 05:44AM |
| Nov 23, 2023 04:43AM | Dan Moffet | |
| Nov 22, 2023 09:23PM | theminimark | |
| Nov 22, 2023 03:39PM | 6464s | Edited: Nov 22, 2023 03:51PM |
| Nov 22, 2023 02:28PM | Dan Moffet | |
| Nov 22, 2023 12:54PM | ve9aa | |
| Nov 22, 2023 04:50AM | 6464s | Edited: Nov 22, 2023 05:26AM |
| Nov 21, 2023 03:48AM | 6464s | Edited: Nov 28, 2023 04:48AM |
| Nov 20, 2023 06:33AM | Dan Moffet | |
| Nov 19, 2023 05:59PM | 6464s | Edited: Nov 22, 2023 04:52AM |

|
Total posts: 501
Last post: Apr 19, 2024 Member since:Jan 25, 2017
|
Cars in Garage: 0
Photos: 0 WorkBench Posts: 0 |
Thanks Hugh. It has been a long time since you saw this build. If you really have to know, here's the story.
After making some more drainage points on the floor pan (at the corners just before the rear wheels). I welded in new outer sills, but I used my method of using the stainless washers to separate the two mating metals to let the water weep out; I did the same to the valance panel ( also new) behind rear tire. I removed the front and the rear subframes. I completely scraped the factory undercoating from the bottom including the front wings. Every nook and cranny. I applied coatings of rust remover, then applied urethane seam sealer at all the rust areas that plague the mini. Using a small 4 inch roller and small brush, I painted the entire bottom as well as the top with Sherwin Williams macropoxy industrial coating of epoxy primer and top coated with another 2 part epoxy paint designed to go over that. I did research on this expensive coating. Industry use this coating on outdoor pipes. For the floor pan I had it tinted to a BRG color. I did the same process to the subframes, but had another gallon tinted to a gray.
With this paint job, I just over painted the outer sills, and up to the first rib on the underside as well as the valances with the color and clear coats. It was enough to lay on your back four times for each coat. We put eleven coats on the min. I was well aware of seeing the bottom when lifting the mini off of the yacht, I just had to trust in blending. Since the already painted subframes and suspension parts where painted with a different color epoxy; I just tried to contain the overspray. For the inside, I had to climb in and out many times to spray the inside sides, so I just had to let the top surface of the floors get the over spray. This was not a shell paint job.
There you have the whole story. I probably forgot something, but you should get the overall idea. I feel I did a very thorough job derusting, sealing and painting. No time or expense spared, no regrets, should'ves, or could'ves. I am happy. Good to hear from you. Jim
|
|
Total posts: 7051
Last post: Apr 26, 2024 Member since:May 23, 2002
|
Cars in Garage: 0
Photos: 0 WorkBench Posts: 0 |
|
Looks beautiful Jim! It's come a long way from when I last saw it. Just out of curiosity, why didn't you paint the floors? As it will be loaded onto a yacht, I would think protection from salt air would be important. That leads to another question, what about the bottom?
"Retired: No Job, No Money, Wife and I! Will travel anywhere for Minis"
|
|
Total posts: 501
Last post: Apr 19, 2024 Member since:Jan 25, 2017
|
Cars in Garage: 0
Photos: 0 WorkBench Posts: 0 |
Thanks Dan, thanks theminimark for the compliment. Sorry guys for the crazy picture orientation.
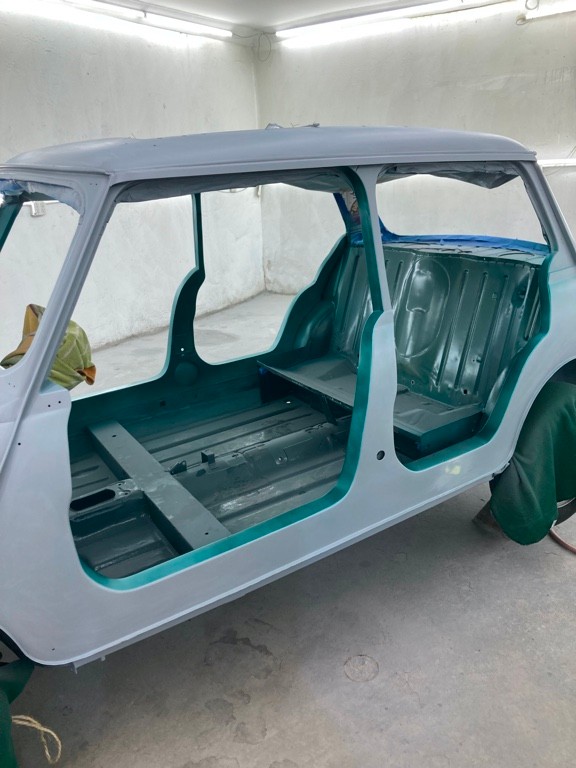
Orienting metal pieces suits me better. First, the front passenger opening. Everything that was done here also applies to the other openings. With the B post, I cut body off leaving the upper thin column. I do like the openness of the original beach cars, but I did this because no one is going to drive without a shoulder/lap seat belts. Another added benefit of leaving this post is that it makes a grab handle for the rear seat passengers, it makes getting in and out of the back seat much easier. I did bring up the shark fin to house the seat belt reel (that's the reason for the exterior hole which will be covered with a rubber bung). Under the reel, I recessed a middle speaker.
The top of the opening is One piece and is about 5 feet in length. It is narrow at the B and is wider at the dash. I left the original curves of the door opening for strength plus I reinforced underside of the opening in case someone decides to stand on the opening sill even though it is boxed. All the reinforcement to the A post for the hoist mounts was done before because it will enclosed and not accessible. I purposely built in many water exits.
A major detail of these openings is the router edges (woodworking term). Putting two metal pieces together at 90 degrees forms a sharp corner. To create soft radius edges, I tacked the two metals together and then cut the sharp corners off, inserted a thick welding rod (the rods can easily be bent) in between the opening and welded all three surfaces together. All together, we are talking 40 linear feet (interior and exterior) of welding.
At the dash, I curved the wide sheet metal to continue the Issigonis dash opening sight lines outward. It has a slight outward flare to it.
|
|
Total posts: 9547
Last post: Apr 26, 2024 Member since:Aug 14, 2002
|
Cars in Garage: 0
Photos: 0 WorkBench Posts: 0 |
|
Quote:
Originally Posted by 6464s
What's up, down, sideways with that? I'm certainly not in control, otherwise it would bass ackwoods. When I posted, it was fine for the first day.
Is there a stay button?
Is there a stay button?
.
"Hang on a minute lads....I've got a great idea."
|
|
Total posts: 694
Last post: Apr 13, 2024 Member since:Aug 6, 2002
|
Cars in Garage: 0
Photos: 0 WorkBench Posts: 0 |
|
What a fantastic build, and to see that front wing and a panel in the sunlight glimmering! It looks a little bit like it's different colours of green depending on the light. Well done Jim! I'm looking forward to seeing it all reassembled with your special touches! Best, MSH
All Together Now.... Everybody......
|
|
Total posts: 501
Last post: Apr 19, 2024 Member since:Jan 25, 2017
|
Cars in Garage: 0
Photos: 0 WorkBench Posts: 0 |
What's up, down, sideways with that? I'm certainly not in control, otherwise it would bass ackwoods. When I posted, it was fine for the first day.
Is there a stay button?
Is there a stay button?
|
|
Total posts: 9547
Last post: Apr 26, 2024 Member since:Aug 14, 2002
|
Cars in Garage: 0
Photos: 0 WorkBench Posts: 0 |
|
Quote:
Originally Posted by ve9aa
Very nice !!!
Big Al is smilin' down at ya, I am sure.
Not sure why, but when I open up the pix most of them are upsidedown or sideways, but the previews (thumbnails) look mostly OK. huh !
Big Al is smilin' down at ya, I am sure.
Not sure why, but when I open up the pix most of them are upsidedown or sideways, but the previews (thumbnails) look mostly OK. huh !
.
"Hang on a minute lads....I've got a great idea."
|
|
Total posts: 8592
Last post: Apr 6, 2024 Member since:Sep 30, 2002
|
Cars in Garage: 4
Photos: 40 WorkBench Posts: 2 |
|
Very nice !!!
Big Al is smilin' down at ya, I am sure.
Not sure why, but when I open up the pix most of them are upsidedown or sideways, but the previews (thumbnails) look mostly OK. huh !
Big Al is smilin' down at ya, I am sure.
Not sure why, but when I open up the pix most of them are upsidedown or sideways, but the previews (thumbnails) look mostly OK. huh !
~ 30 minutes in a Mini is more therapeutic than 3 sessions @ the shrink. ~
Mike ![]() NB, Canada
NB, Canada
|
|
Total posts: 501
Last post: Apr 19, 2024 Member since:Jan 25, 2017
|
Cars in Garage: 0
Photos: 0 WorkBench Posts: 0 |
I forgot to mentioned another modification. For those with eagle eyes. I welded a 90 degree bent strip of metal where the side of the body meets the hood (roof). This has three purposes:
1) it hides the original body curves of door and windows for a sleeker look.
2) inside this compartment are two attachment points at the front and back. A stainless rod with strataglass (aka isinglass) is inserted. This hanging cover will drop below the the lower sill seam and go the full width of the mini's exterior body seams. The clear cover will allow protection from the weather and you will still be able to see the beautiful custom upholstery. The beauty of this system is that it can be installed in seconds without fuss. I'm using stainless Loxx brand fasteners to secure the sides and bottom which also works without fuss (forget those awful snaps).
3) and lastly, this metal piece will divert water flow outward instead of following the body lines.
|
|
Total posts: 501
Last post: Apr 19, 2024 Member since:Jan 25, 2017
|
Cars in Garage: 0
Photos: 0 WorkBench Posts: 0 |
Dan. Thanks for the compliment. Just a few details. All hidden fine thread fasteners for the grab handles ala Moke for the 3 passengers. Hidden fasteners for the rover mirrors. Cell phone storage, all around, for the passengers because I want them to hold onto the grab handles. Custom steel dash for extra gauges and switches, tweeter speakers & hidden and retractable beverage holders. Hidden Bluetooth amplifier where the heater was. I'm hanging an air blower there as well. Recessed Side speakers and the standard rover rear speakers on the back shelf. I made tilting lockable bins under rear seat for cell phones, wallets etc. I reinforced both A pillars area for hook mounts and one on the tunnel. This will enable the mini beach car to be lifted onto a yacht.
The build quality was amazing. Mirror imaging and joints coming in at a 1/32" deviation. I was amazing myself.
The build quality was amazing. Mirror imaging and joints coming in at a 1/32" deviation. I was amazing myself.
|
|
Total posts: 9547
Last post: Apr 26, 2024 Member since:Aug 14, 2002
|
Cars in Garage: 0
Photos: 0 WorkBench Posts: 0 |
|
Jim:
What a beauty! BIG AL would be pleased.
.
"Hang on a minute lads....I've got a great idea."
|
|
Total posts: 501
Last post: Apr 19, 2024 Member since:Jan 25, 2017
|
Cars in Garage: 0
Photos: 0 WorkBench Posts: 0 |
Image Gallery
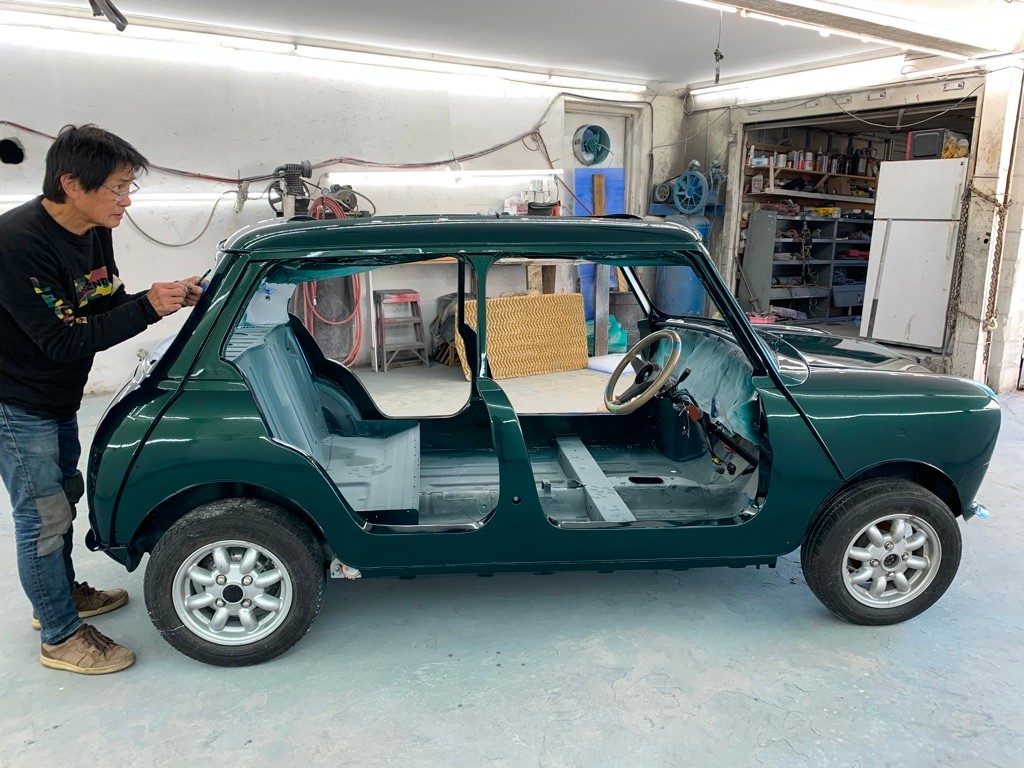
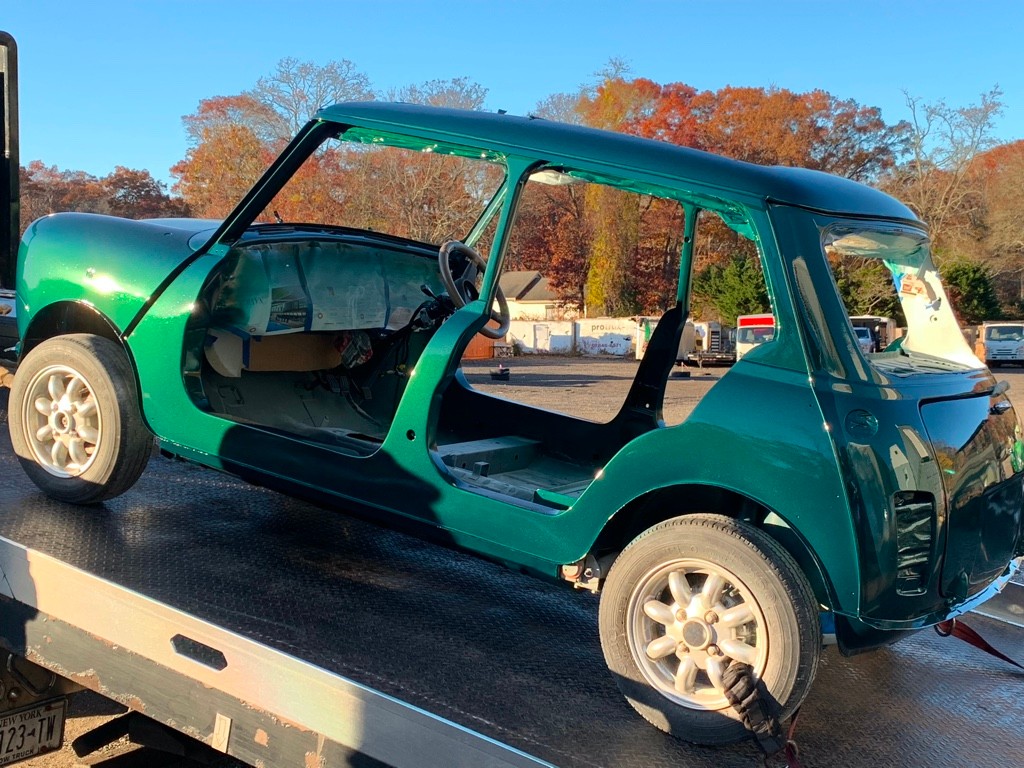
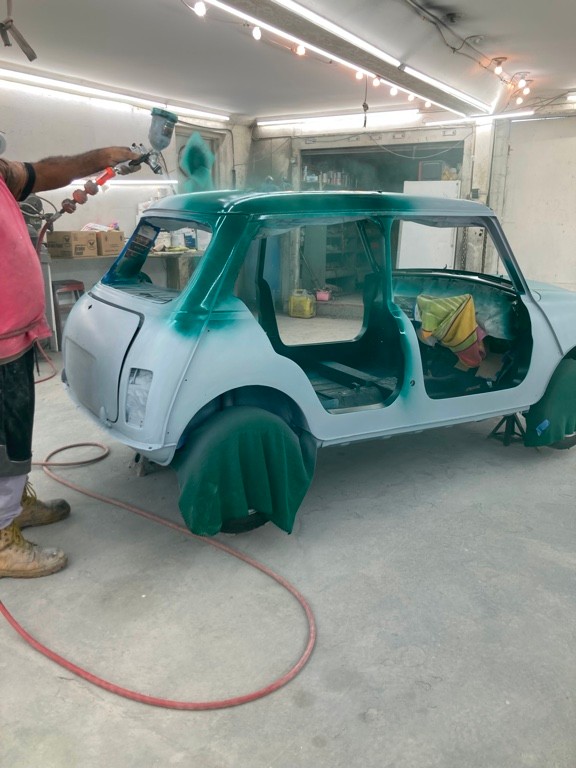
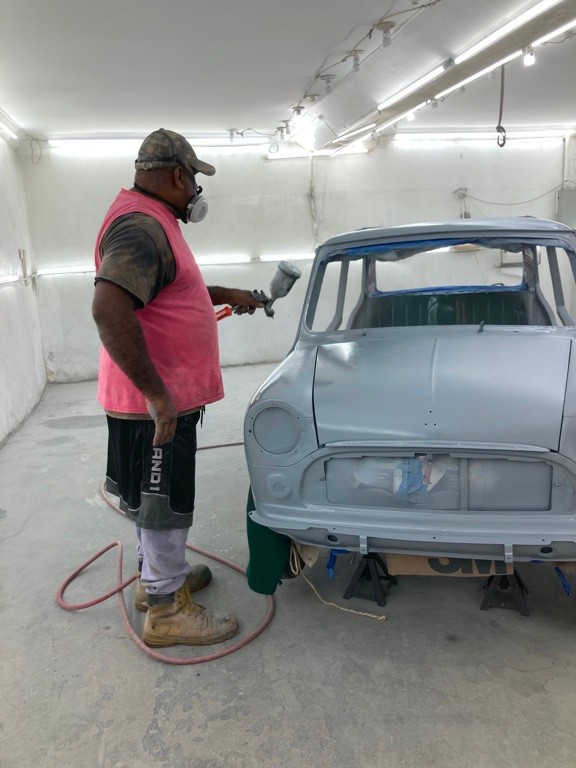
As you can see my painter is a pretty big guy. I climbed into the interior and sprayed the inside and the panels below the lower seam line. He sprayed the rest.
That was Saturday and today Sunday, we loaded up the flat bed. I wish Big Al could see this build. Jim


